Posts > Coding Tutorial #3: The first page of your app
Coding Tutorial #3: The first page of your app
Jul 16, 2019
Greetings from the Purple Polar Bears,
As the title suggests, the third blog in our “becoming a developer” blog and vlog series will revolve around the building and styling of your first page of your web-app.
In the first 2 blogs, we set everything up and made it possible to start building the web-app you are looking for. Important to note here is that the web-app we are going to build here will show you how it is done so that you can do it for yourself. This means that we will choose a web-app with a particular purpose, in this case, the creation of an interactive web-based CV/resume.
Without further ado, let’s get started!
To view our related vlog, open the video below:
Installing Atom
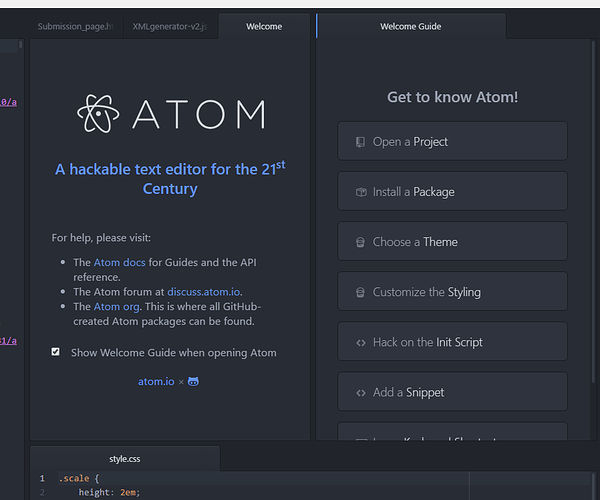
To build the start page of your app we need to install a program that will allow you to edit the code. Atom is a program that can be used. This is an open source and free program.
Go to https://atom.io to download this editor and, hereafter, open the program.
Now, the earlier project you saved in your Documents will be opened in Atom. So that we can start editing.
Go to Atom and choose "open project" on your right. Navigate to your documents and click on the file “purplepolarbear”. Then click on the button "open" in your screen.
Do you also see the project in Atom now? If so, proceed to the next instruction.
Before we edit the code, we are going to explain a bit about "Git" and its magic. You remember Git, right? The version manager.
First, we need to create a new branch so that our changes are not immediately saved in the total project.
When creating a branch, the image below illustrates what happens:
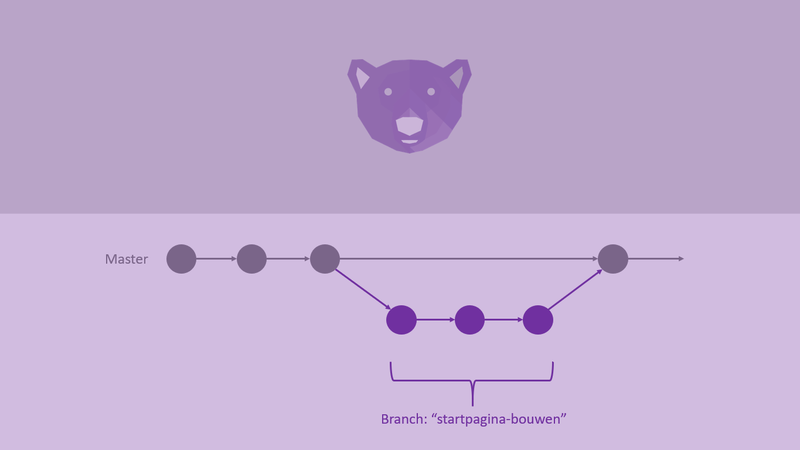
Here you see two horizontal lines or branches. The top line represents the master branch and the bottom horizontal line represents the newly created work branch or in this case “startpagina-bouwen”. The branch system allows for work to be carried out which does not directly change or alter the full body of work found in the master branch.
So as you can see, a new version has been created where our changes can be found. This is temporary. If our changes are accepted, the changes will be added to the main version (master) and this version (or branch) is no longer needed.
Creating a new Branch
Go back to your terminal to create a new branch. In the terminal type:
--------------------------------------------------------------------------------------------------------------------------------------------------------
git checkout -b "startpagina-bouwen"
--------------------------------------------------------------------------------------------------------------------------------------------------------
Press Enter
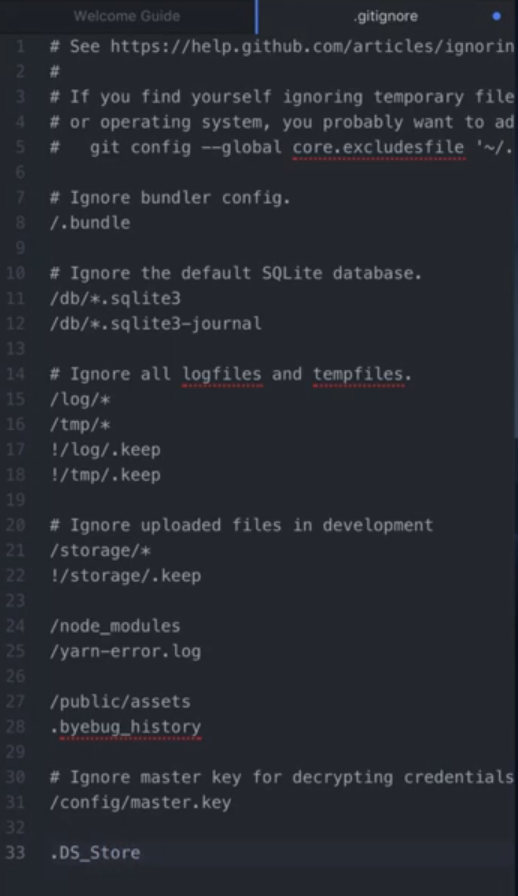
Now, we are going to edit the “.gitignore” file so that the files that we do not want to include in Git are not saved in Git.
Go back to Atom and click the “.gitignore” file. Open this file and add:
--------------------------------------------------------------------------------------------------------------------------------------------------------
.DS_store
--------------------------------------------------------------------------------------------------------------------------------------------------------
In case you needed some extra instruction, this should look like this at the bottom of the .gitignore file.
Yes! Finally, we can start building the startpagina (start page) of our app. Here, we need to do three things: Create the controller, the view and the route. We will start with the Controller.
The controller
In the controller, we communicate to the app which page should be shown with which action.
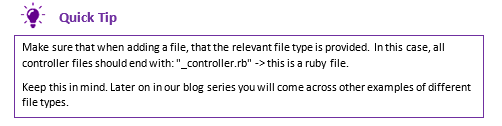
Go to controller filer "app" and then to the sub-file "controllers". Click on the right mouse button and choose "New File" and then type the file name in.
We use:
"pages_controller.rb"

Open the "pages" controller. Here, we are going to insert code which can serve multiple pages. Let's start with the startpagina (start page).
Type the following in the controller:
--------------------------------------------------------------------------------------------------------------------------------------------------------
class PagesController < ApplicationController
end
--------------------------------------------------------------------------------------------------------------------------------------------------------
Save the change by pressing [cmd] & [s]
The first line, we let rails know what the name is from this code. Thereafter, we add a section for the home page.
Therefore, type:
--------------------------------------------------------------------------------------------------------------------------------------------------------
def startpagina
end
--------------------------------------------------------------------------------------------------------------------------------------------------------
Save the change by pressing [cmd] & [s]
Now we will tell rails that the first pages controller is the home page controller. Go to the folder "config" and open the file "routes"
This is what should be seen on this page:
--------------------------------------------------------------------------------------------------------------------------------------------------------
Rails.application.routes.draw do
root to: ‘pages#startpagina’
end
--------------------------------------------------------------------------------------------------------------------------------------------------------
Save the change by pressing [cmd] & [s]
This route will be searched by rails in the folder "views".
At this stage, rails will not be able to find the page because it's not there yet. So we need to create a new file.
Open the folder "app" and then the folder "views" in Atom. Create a new folder and name it "pages". Within this folder, create a new file and name it "startpagina.html.erb”.
Now we are going to make a switch from Ruby code to HTML code.
We are going to use this to add text to this page. Open the file you just created in Atom, "startpagina.html.erb", if it is not open already and type in the following:
--------------------------------------------------------------------------------------------------------------------------------------------------------
<h1>Startpagina</h1>
<p>Welkom!</p>
--------------------------------------------------------------------------------------------------------------------------------------------------------
Save the change by pressing [cmd] & [s]
We now have a heading "h1" and a paragraph "p" added to the page. It is now time to check out the page.
Open your terminal and type in:
--------------------------------------------------------------------------------------------------------------------------------------------------------
rails s
--------------------------------------------------------------------------------------------------------------------------------------------------------
Press Enter
If your rails application is still running then that is also fine. If at a later stage, you want to stop your rails application, you can do so by pressing [Ctrl] [c].
Go now to your browser and type in:
--------------------------------------------------------------------------------------------------------------------------------------------------------
localhost:3000
--------------------------------------------------------------------------------------------------------------------------------------------------------
Press Enter
Do you now see the title "startpagina" and the text "Welkom!"?
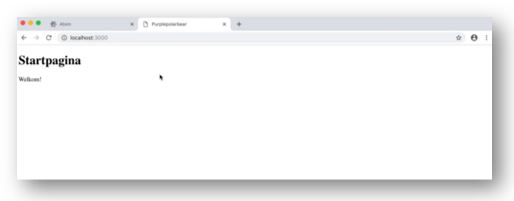
Nice! Me too.
Admittedly, the page doesn’t look great yet so to rectify this problem, we are going to install Twitter Bootstrap to help us with the design of the page.
Bootstrap is a free and open-source framework directed at responsive, mobile-first front-end web development. It contains CSS- and JavaScript-based design templates. Through Bootstrap, you can choose a particular web-design and style for the web-app you want to build.
Go to the terminal and open a new tab. Type in the new tab:
--------------------------------------------------------------------------------------------------------------------------------------------------------
yarn add bootstrap jquery popper.js
--------------------------------------------------------------------------------------------------------------------------------------------------------
Press Enter
We have also added the JavaScript library jquery and popper.js because bootstrap uses these. Now, Bootstrap is installed, we still need rails to know to actually use it. Bootstrap consists of 2 parts:
- JavaScript, for fancy things such as pop-ups and,
- CSS for styling
First, we are going to ensure that the JavaScript part works.
In Atom, open the file "application.js" and remove the console log and type:
--------------------------------------------------------------------------------------------------------------------------------------------------------
import "bootstrap"
--------------------------------------------------------------------------------------------------------------------------------------------------------
Save the change by pressing [cmd] & [s]
To ensure that Bootstrap is working as it should, we need to add code to webpack so that jQuery and Popper.js are correctly loaded.
Go to the folder "config" and then the folder "webpack" and open the file "environment.js"
Copy the following code and paste this to the file:
--------------------------------------------------------------------------------------------------------------------------------------------------------
const { environment } = require('@rails/webpacker');
const webpack = require('webpack');
environment.plugins.prepend(
'Provide',
new webpack.ProvidePlugin({
$: 'jquery',
jQuery: 'jquery',
jquery: 'jquery',
'window.Tether': 'tether',
Popper: ['popper.js', 'default'],
})
);
environment.loaders.append('images',
{
test: /\.(png|jpg)$/,
loader: 'file-loader',
options: {
name: '[name][md5:hash].[ext]', // Name of bundled asset
outputPath: 'images/', // Output location for assets. Final: `app/assets/webpack/webpack-assets/`
publicPath: '/images/' // Endpoint asset can be found at on Rails server
}
}
)
module.exports = environment
--------------------------------------------------------------------------------------------------------------------------------------------------------
Save the change by pressing [cmd] & [s]
Now we are going to fix the SCSS side. In a future vlog, we will talk more about what SCSS could mean for you but for now, we will stick with the basics.
Go to the folder "javascript" and add a new folder named "scss", open the folder "scss" and add the file "application.scss". Then open the file "application.scss"
Within this file you should add the following line of code:
--------------------------------------------------------------------------------------------------------------------------------------------------------
@import "~bootstrap/scss/bootstrap.scss";
--------------------------------------------------------------------------------------------------------------------------------------------------------
Save the change by pressing [cmd] & [s]
The application.scss still needs to be added to webpack so that the styling is correctly loaded. Go to the folder "javascript" and open the folder "packs". Then open the file "application.js".
Within this file, you should add the following line of code:
--------------------------------------------------------------------------------------------------------------------------------------------------------
import '../scss/application.scss';
--------------------------------------------------------------------------------------------------------------------------------------------------------
Save the change by pressing [cmd] & [s]
Now we to ensure that our views also use Bootstrap. Copy the code: “javascript_pack_tag_application” from this file and navigate to the folder "views"
Open the folder "layout" and in the file "application.html.erb", paste the copied code twice.
Edit the second line to:
"stylesheet_pack_tag"
This means we have added the bootstrap files to the right place.
Now, go back to your browser and refresh. Do you also see that all the letters have changed?
Great! Your Bootstrap works. It is time now to add the edited files to Git. You can add files by typing in the following:
--------------------------------------------------------------------------------------------------------------------------------------------------------
git add .
--------------------------------------------------------------------------------------------------------------------------------------------------------
Press Enter
To see if which files have been added to the commit, you can check this by typing in the following into your terminal:
--------------------------------------------------------------------------------------------------------------------------------------------------------
git status
--------------------------------------------------------------------------------------------------------------------------------------------------------
Press Enter
Here you will see the list of added files marked in green. Any files that are still to be added will be marked in red. In this case, all changes have been added through the “git add .” command which means that there should be no files marked in red.
At this point, all changes have been added but have not been saved to the version manager git yet. This can be done by “Committing” your changes.
To do this, type in the following:
--------------------------------------------------------------------------------------------------------------------------------------------------------
git commit -m “added bootstrap, startpagina controller, route and view”
--------------------------------------------------------------------------------------------------------------------------------------------------------
Press Enter
Next, we will push our commit to gitlab. Without pushing your commit the updates you added cannot be merged with the master branch.
Once you have committed your work, in your terminal you will see that things have happened. From there you should copy and paste the last line provided by your terminal (above where your username is stated). For me, that command looked like this:
--------------------------------------------------------------------------------------------------------------------------------------------------------
git push –set-upstream origin startpagina-bouwen
--------------------------------------------------------------------------------------------------------------------------------------------------------
Press Enter
That was your first commit and push to master! Awesome! Well done if you have followed us this far. We hope that you were able to complete the steps provided above without too much complication. This brings us to the end of our third blog installment.
Blog Recap
- Downloaded Atom – your code editor
- Created a new branch
- Edited the git.ignore file
- Created the Controller, Route, and View
- Setup Bootstrap
- Committed and Pushed changes to Gitlab
In our next vlog, we will choose and implement a Bootstrap design template for your web-app which is going to look amazing. So make sure not to miss it!
Meer?
Abonneer je op ons Youtube kanaal! Dan krijg je een notificatie op het moment dat we een nieuwe vlog lanceren :-)