Content > Coding Tutorial #4: Styling of your Web App
Coding Tutorial #4: Styling of your Web App
Aug 14, 2019
Hello readers,
First off, congratulations on making it this far. This shows that you have the kind of mentality it takes to get things done. We already like you.
In this blog post, we are going to tackle some styling. You will learn a thing or two about the design of the page and how to change it. Pretty cool, right?
We will use a start bootstrap template for this so that we can easily describe the different elements of your startpagina (homepage). The template that we are going to use is the resume template because our purple polar bear needed one to show off, so we thought we would oblige. It might also be something that you might want to use in the future, so feel free to enter in your own details and create your own web-resume.
To view our related vlog, open the video below:
let's start!
Open your browser and go to:
https://startbootstrap.com/previews/resume/
Via this link, you open the template that we use for this blog. Scroll over the page so that you can view the template well. Then click on the "download" button because we are going to use this template.
Open the zip folder open via the download folder or via your browser. First, we are going to open our previously built project so that we can put the new template there.
Press shift and the spacebar to search for your terminal and press enter to open your terminal. Go to the purple polar bear project in your terminal by navigating to “cd Documents” and then typing “cd purple polar bear”. Remember - cd stands for “Change Directory”.
Check now to see if you are still on the right branch by checking the git status.
Are you still on the “startpagina-bouwen” branch?
Nice!
Start the project by typing "rails s" and pressing enter. It can take a few seconds for the app to start up completely.
Then check in your browser if the app has started by typing the following into your browser:
--------------------------------------------------------------------------------------------------------------------------------------------------------
localhost:3000
--------------------------------------------------------------------------------------------------------------------------------------------------------
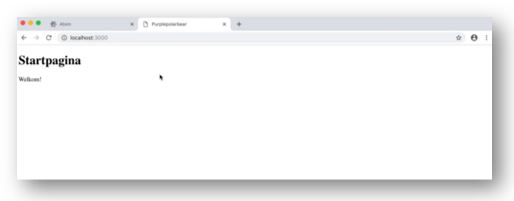
You can now see the title “Startpagina" and the text "Welkom ", right? Great! Me too. Navigate to Atom, the editor program, so that we can load our previously created project.
Search by pressing shift and the space bar, the program “Atom” and open the program. Then add the project. Go to the folder “app”, then the folder “views”, then open “pages” and click on the "startpagina.html.erb" page.
We are ready to start but before we do, we recommend that for this next section, that you also have a look at our fourth Vlog post. The instructions given via the blog may be more difficult to follow than actually viewing one of our purple polar bears going through it with you.
Go to your downloads to open your downloaded project. Put the downloaded folder, from which the zip file you have already opened, on your dashboard.
Open the folder and left click on the file “index.html” so that you can open the file with the program, Atom. Now you see the HTML code in your Atom editor. This code ensures that you can see the resume page in your browser.
Copy from this page the piece of code that is defined in the body and paste, the copied code, in the file “startpagina.html.erb” within our own project.
Replace the body tags with the div tag. The body is already defined within the layout. Lastly, remove all script tags at the bottom of the page because this is handled by Webpack within our own project.
Webpack is a module bundler. Its main purpose is to bundle JavaScript files for usage in a browser, yet it is also capable of transforming, bundling, or packaging just about any resource or asset.
Go to your browser and reload the page. Now you see all kinds of new elements on your page appear and you see a lot of text on the page. We know, the styling is of the text is not too slick yet and does not look like the template that we saw earlier. That's because the scss styling has not yet been added.
Let's do that right away.
To do this, open the folder that we have downloaded and click the "scss" folder, select all files in this folder and then copy it by clicking your left mouse button and clicking on the copy function.
Open via your finder your documents and open the Project “Purple Polar Bear”. In this project, click on the folder “app”, then the folder "javascript" and then the folder "scss". Paste the copied files in this folder
Go back to atom and open the "scss" file. You should see the files marked in green. As these files have been added. Open the file application.scss and add here the following import code:
--------------------------------------------------------------------------------------------------------------------------------------------------------
@import “resume”;
--------------------------------------------------------------------------------------------------------------------------------------------------------
Save by pressing [cmd] [s] simultaniously
Do not forget to end the code with a semi-colon ";"
SCSS is a preprocessor which lets you use features that aren't a part of the wider CSS standard yet, and provides better workflows for maintaining your stylesheets.
If we then open the resume.scss file, we see the rest of the files being imported here. Go back to your browser and refresh the page. Refreshing of the page can take longer than normal as the styling files are being loaded. If all goes well, the styling for your page should be correctly loaded. Only the pictures have not been added yet.
Go to the downloaded folder and open the main folder, find and click on the folder "img". Copy the profile picture from this folder and navigate to the folders from our own project.
Click on the folder "assets", then open the folder "images" and paste the copied picture in this folder.
Now we need to return to the file startpagina.html.erb to add the image tag. Go back to Atom and open “startpagina.html.erb”. Search for the picture location on this page - on our page, we can find this on line 7.
Add, under this code, a rails image tag with the same classes. After which, remove the old image code. Make sure to save your modifications and just in case you need a reminder, to save, press the cmd button and the “s” button at the same time.
In atom, your document is saved if you see an X in the tab. If there is still a circle symbol in the tab, your document has not been saved.
Hoppa! Refresh your page in the browser.
Even if this is a very handsome man, we are creating a resume for our own much more handsome purple polar bear. So we are going to change the picture. Because we can, and we want to...
We are going to take the profile picture of our bear from our desktop and drag this picture to the images folder from our project. The image on our home page has not changed yet. That is because we have not yet changed the name of our image.
Go back to Atom and open the startpagina.html.erb and change the name of the picture. This is the actual name of the picture in our image folder.
--------------------------------------------------------------------------------------------------------------------------------------------------------
<%= image_tag (“profile.jpg”, :class => ‘img-fluid img-profile rounded circle mx-auto mb-2’ %>
--------------------------------------------------------------------------------------------------------------------------------------------------------
Here we remove a class so that the picture from our bear is not round anymore.
Refresh your page and voila!
In addition, our bear is purple, so we want a purple color instead of the current one appearing on our screen. Check the color code of the current color in your browser, left click with your mouse in your screen and select the option "inspect".
Then click on the mouse icon, navigate to the color element and look at the bottom right of your screen to see which color code is provided in your browser I see this code - #bd5d38
Copy this code, navigate to the file "variables" and search for the color code. This should be found behind "orange". Next to “$primary” you should also see "orange". This is the color that we need to adjust.
We want to make this purple so we replace "orange" with "purple", refresh your page, and you will see the area turned purple.
If you see the change to purple too, we are heading in the right direction. If you look through the HTML, you will see a lot of “div’” classes. Classes influence certain elements on your screen so that they behave in a certain way.
Classes are specified in the scss files. For example, resume items, have a look! Just a quick example: add to this div, "test" and then go to your startpagina.scss file.
Define in this file the class "test". Within this class, we say that the element should have a specific margin.
Where, after the refreshing of your page in your browser, the element drops significantly in the page you are viewing. This is the case because we have modified this element by adding a margin rule above. This is actually something we don’t want, of course, so we can remove "test" from the scss file.
Next!
If we now look at the page, the photo and the text should be how we want it to be. Only, the icons, the scroller, and the font type are currently not loaded correctly. This is something we will pick up in our next blog. Now, we are going to edit the text on this page.
Go back to the startpagina.html.erb file and adjust the text. For example, our bear is going to be called "Purple Polar Bear", lives in the "Noordelijke IJszee 3000" (north pole 3000) and can be reached at this email address hello@purplepolarbear.nl. The rest of the information is unnecessary for us so we will delete this.
Save your changes and refresh your browser. Boom! The text has been changed.
Now you can change the rest of the text so that you have a complete resume. We have changed and added one or two things. So these changes should be saved in Gitlab.
Go Back to your terminal and open a new tab. type in:
--------------------------------------------------------------------------------------------------------------------------------------------------------
git status
--------------------------------------------------------------------------------------------------------------------------------------------------------
press enter
You will see all the changed files in red. Now type in:
--------------------------------------------------------------------------------------------------------------------------------------------------------
git add .
--------------------------------------------------------------------------------------------------------------------------------------------------------
press enter
Check if all files have been added by again typing in:
--------------------------------------------------------------------------------------------------------------------------------------------------------
git status
--------------------------------------------------------------------------------------------------------------------------------------------------------
press enter
Are all changed files highlighted in green now? Nice! Now type in:
--------------------------------------------------------------------------------------------------------------------------------------------------------
git commit -m "resume template added and personalized"
--------------------------------------------------------------------------------------------------------------------------------------------------------
press enter
Then you can type:
--------------------------------------------------------------------------------------------------------------------------------------------------------
git push
--------------------------------------------------------------------------------------------------------------------------------------------------------
Press Enter
Now your changes have been saved and added to your Gitlab repository.
Blog Recap
- We downloaded a template and pasted the HTML in our own project.
- We also transferred the styling of this HTML in our CSS files.
- We changed the color, the photo of the template and showed you how to change the text of your resume.
- Lastly, we saved your changes, committed them and pushed them to Gitlab.
Good luck with the further filling out of your resume! Don't forget to save your changes, if you make any, and push the changes to Gitlab in the same way that we showed you.
In the next blog, we are going to dot the "I's" and cross the "t's" regarding the styling of your resume. Make sure not to miss it.
See you next time!
Meer?
Abonneer je op ons Youtube kanaal! Dan krijg je een notificatie op het moment dat we een nieuwe vlog lanceren :-)